Hose Swapping
Hose swapping allows an operational brigade to exchange an in-service hose for a fresh replacement from a centralised hose cache.
How It Works
Section titled “How It Works”A cache unit (typically a district or group) maintains a stock of serviced hoses at one or more physical cache locations. When a brigade needs to swap a hose — after a job, during routine rotation, or because a hose is damaged — they return it to the cache and take a replacement. StationOne records the transfer and tracks the condition of the returned hose.
Swaps can be initiated:
- Internally by brigade members or cache admins from the hose index
- Publicly via a QR code at the cache location (no login required)
Prerequisites
Section titled “Prerequisites”- A unit acting as the cache (district, group, or brigade level)
- At least one Hose Cache location created under that unit
- Hoses assigned to that cache location with status In Service
- Brigade admin role on the cache unit to configure settings
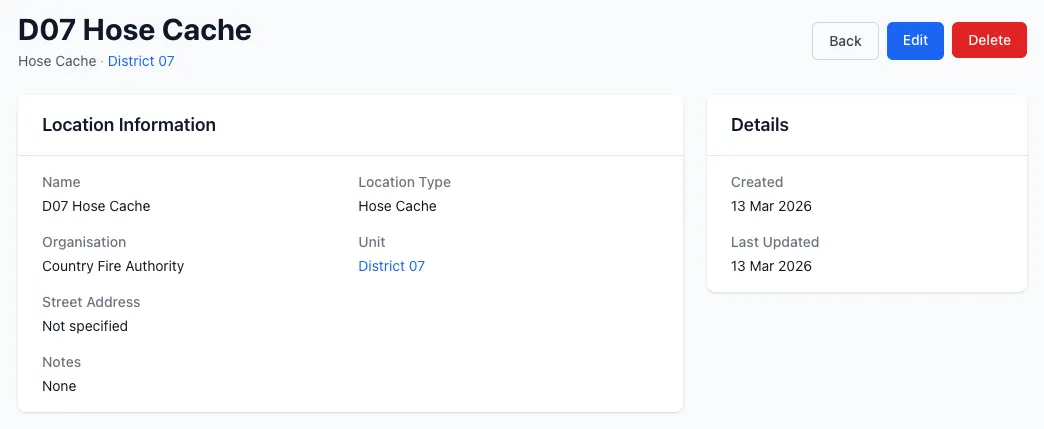
Step 1: Create a Hose Cache Location
Section titled “Step 1: Create a Hose Cache Location”Before enabling swaps, the cache unit needs a location of type Hose Cache.
- Go to your unit’s Locations (found under unit settings or the locations module)
- Click New Location
- Set the Location Type to
Hose Cache - Give it a descriptive name (e.g. District 07 Hose Cache)
- Save the location
Repeat for any additional physical cache sites.
Step 2: Add Hoses to the Cache
Section titled “Step 2: Add Hoses to the Cache”Hoses available for swapping must be assigned to a Hose Cache location with In Service status.
- Navigate to Hoses under your cache unit
- For each spare hose, open the hose and set its Location to the cache location created above
- Ensure its status is In Service
These hoses will appear as available replacements during a swap.
Step 3: Configure Swap Settings
Section titled “Step 3: Configure Swap Settings”Open the Hose Swap Settings from the hose index of your cache unit:
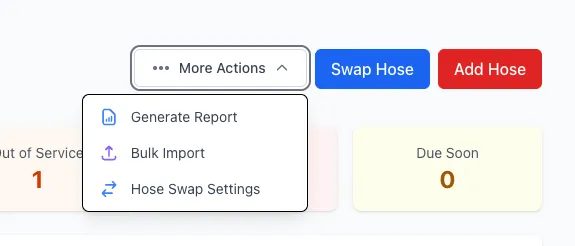
- Go to Hoses for the cache unit
- Click the More Actions menu (⋯) in the top right
- Select Hose Swap Settings
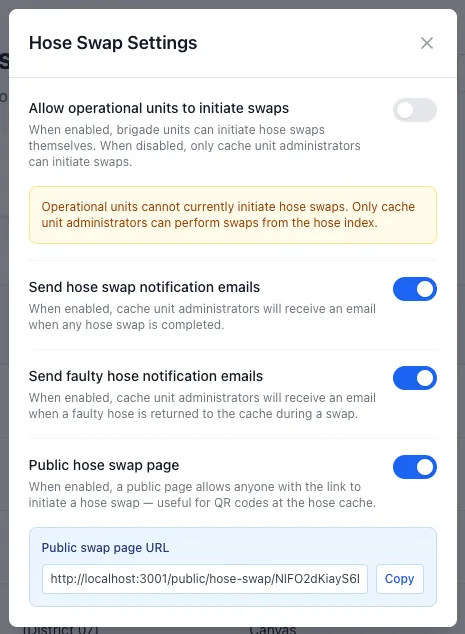
The settings modal contains four options:
Allow operational units to initiate swaps
Section titled “Allow operational units to initiate swaps”When enabled, brigade units that sit under the cache unit can initiate swaps themselves from their own hose index. When disabled, only cache unit administrators can perform swaps.
Use this to control whether self-service swapping is available to brigades or whether a cache administrator must be present.
Send hose swap notification emails
Section titled “Send hose swap notification emails”When enabled, cache unit administrators receive an email each time a hose swap is completed. Useful for keeping cache managers informed of stock movements.
Send faulty hose notification emails
Section titled “Send faulty hose notification emails”When enabled, cache unit administrators receive an email when a hose is returned to the cache and marked as not functional. This prompts follow-up action on the faulty hose.
Public hose swap page
Section titled “Public hose swap page”When enabled, a public-facing page is generated for the cache unit. Anyone with the link (or a QR code) can initiate a hose swap without logging in to StationOne — ideal for placing a QR code at the physical cache location.
Once enabled, the URL for the public swap page is displayed in the settings modal. Copy it or print it as a QR code to place at the cache.
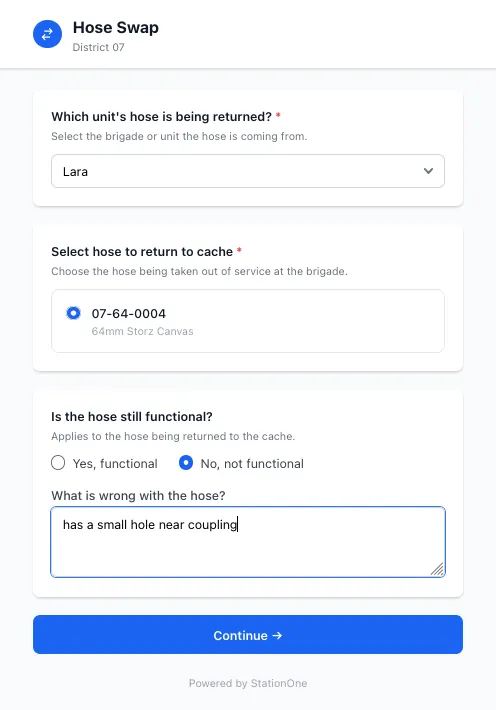
Performing a Swap (Internal)
Section titled “Performing a Swap (Internal)”From the brigade hose index
Section titled “From the brigade hose index”- Go to Hoses for the brigade unit
- Click Swap Hose (visible when a cache with available hoses exists)
- Select the hose being taken out of service
- Indicate whether the hose is still functional — if not, add a note describing the fault
- If the cache unit has multiple cache locations, select which cache the hose is being returned to
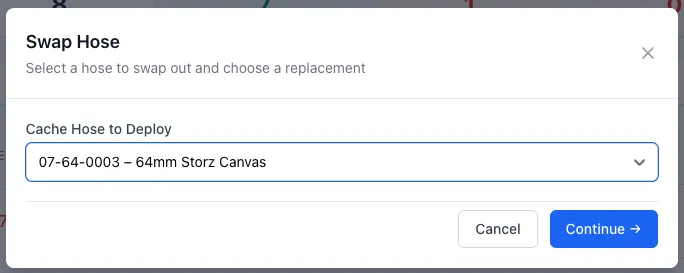
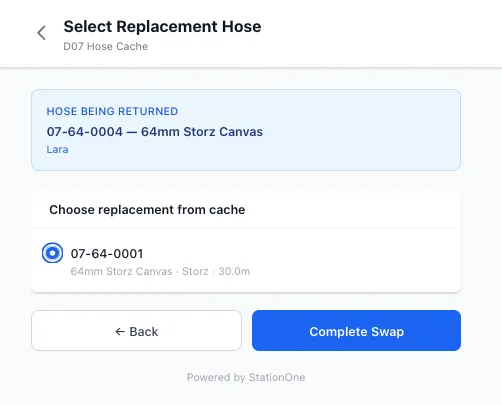
- Click Continue to choose the replacement hose
- Select the replacement hose from the available cache stock
- Confirm the swap
The returned hose is moved to the cache location, and the replacement is assigned to the brigade.
From the cache unit hose index
Section titled “From the cache unit hose index”Cache administrators can perform swaps on behalf of any child brigade:
- Go to Hoses for the cache unit
- Click Swap Hose
- Select a hose from the cache
- Select the hose from the brigade which will be returned to the cache
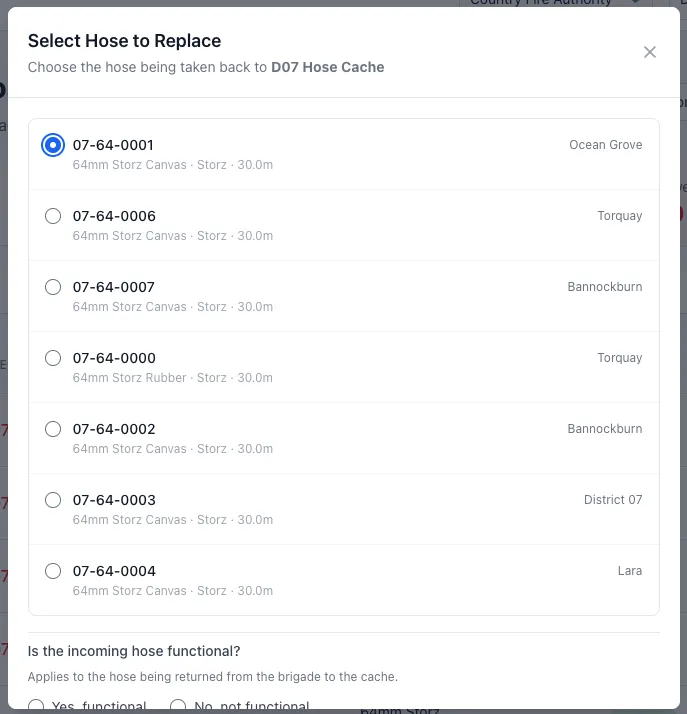
- Mark its functional status and add notes if faulty

- Confirm the swap
Performing a Swap (Public Page)
Section titled “Performing a Swap (Public Page)”The public swap page is designed for use at the physical cache location, typically accessed by scanning a QR code. This must be enabled in the Hose Swap settings at the Cache Unit.
- Scan the QR code or visit the public swap URL
- Select the unit the hose is coming from
- Select the specific hose being returned
- Indicate whether the hose is functional — add a note if not
- Click Continue
- Select a replacement hose from the available cache stock
- Confirm the swap
No login is required. The swap is recorded in StationOne against both the returned and replacement hoses.
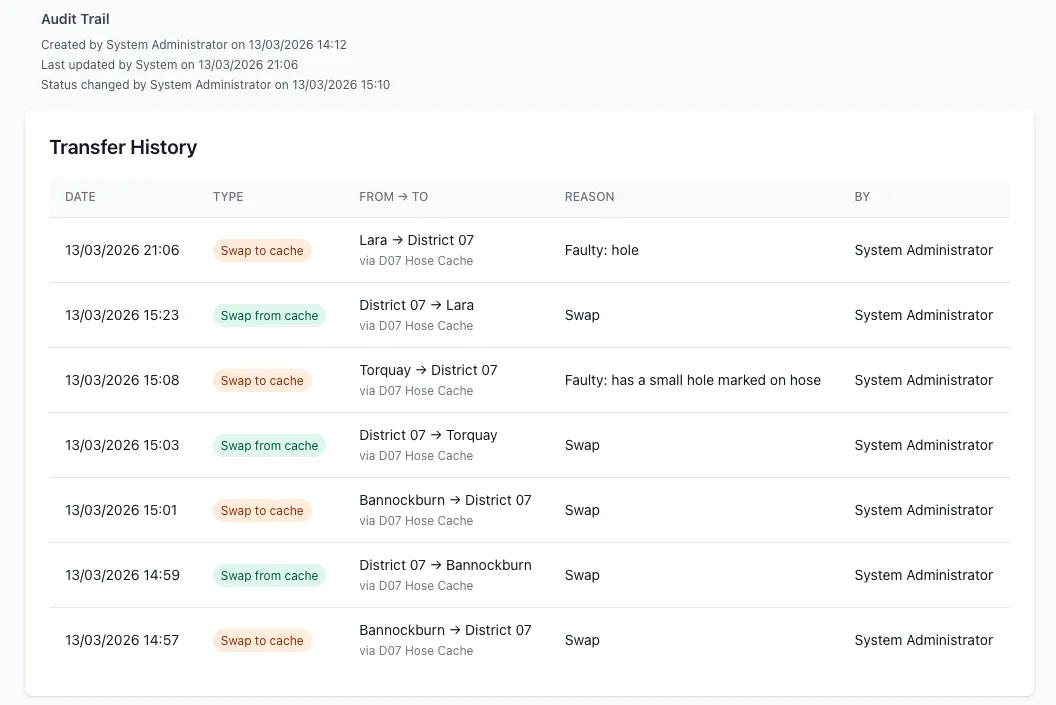
Viewing Swap History
Section titled “Viewing Swap History”Transfer history is available on individual hose records:
- Open a hose record
- Scroll to the Transfer History section
Each entry shows the date, direction of movement, and any condition notes recorded at the time of swap.
Related Guides
Section titled “Related Guides”- Create a Hose — Add hoses to the system
- Repair a Hose — Log repairs on returned faulty hoses
- Retire a Hose — Remove hoses from service permanently
- Public Hose Interface — Public hose testing via QR code