Check-In Kiosk
The Check-In Kiosk gives brigade members a simple, touch-friendly way to log their attendance without needing a StationOne account or password. It is designed to run on a shared device — such as an iPad or PC — at the station entrance.
Members tap the activity type they are attending, select their name from a searchable list, and confirm — or, if QR badge check-in is enabled, simply scan their personal check-in code. The check-in is recorded instantly. Visitors (non-members) can also be logged if the optional visitor check-in is enabled.
Prerequisites
Section titled “Prerequisites”- Brigade admin or organisation admin role
- At least one member in your unit
Enabling the Kiosk
Section titled “Enabling the Kiosk”1. Open Brigade Settings
Section titled “1. Open Brigade Settings”- Log in to StationOne
- Navigate to Brigade Settings
- Click the Check-In Kiosk tab

2. Turn On the Kiosk
Section titled “2. Turn On the Kiosk”Click the Enable toggle next to Check-In Kiosk for the unit. This switches on the feature; you’ll still need at least one kiosk configuration (below) to generate a usable URL.
3. Add a Kiosk Configuration
Section titled “3. Add a Kiosk Configuration”A unit can have multiple kiosk configurations — one per physical device or station entrance (useful if you have more than one station or depot). Each configuration gets its own URL, QR code, and independent Visitor/QR badge check-in toggles.
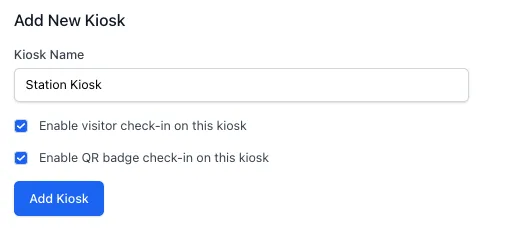
- Under Add New Kiosk, enter a Kiosk Name (e.g. “Main Station Kiosk”)
- If your unit has availability stations configured, optionally select a Station Location to tag check-ins from this device
- Leave Enable QR badge check-in on this kiosk checked unless you want this specific device to be name-selection only (see QR Badge Check-In below)
- Optionally check Enable visitor check-in on this kiosk
- Click Add Kiosk
A unique kiosk URL and QR code are generated automatically for the new configuration:
https://app.stationone.com.au/public/kiosk/[unique-token]Existing configurations can be edited (name, station), toggled, or removed from the same list — see Kiosk Configurations below.
4. Open the Kiosk on Your Station Device
Section titled “4. Open the Kiosk on Your Station Device”- Copy the kiosk URL (use the Copy button) or scan its QR code
- Open the URL on your station device — iPad, tablet, or PC
- Leave the browser open in full-screen or kiosk mode
The page auto-refreshes every 5 minutes so newly created sessions appear without a manual reload.
Managing Kiosk Configurations
Section titled “Managing Kiosk Configurations”Each row in the Kiosk Configurations list represents one physical device/URL. From here you can:
- Edit — change the kiosk’s name or station location (pencil icon)
- Visitors On/Off — toggle visitor check-in for that specific device
- QR Check-In On/Off — toggle QR badge scanning for that specific device
- Regenerate URL — invalidate the current URL and QR code, issuing a new one (see Regenerating the Kiosk URL)
- Delete (trash icon) — remove the configuration entirely; its URL stops working
Toggling visitor or QR check-in takes effect immediately — the change is reflected on the kiosk device the next time it loads or auto-refreshes.

Check-In Types
Section titled “Check-In Types”The kiosk home screen shows tiles for each available check-in type. Tiles only appear when relevant:
| Tile | When it appears |
|---|---|
| Training | One or more training sessions are scheduled for today |
| Events | One or more events are scheduled for today |
| Duty Crew | Duty Crews module is enabled and at least one active crew exists |
| Other Activity | Always shown |
| Visitor | Only when visitor check-in is enabled (see below) |
Training and Event Sessions
Section titled “Training and Event Sessions”If more than one session is scheduled for the same day, members first select which session they are attending before choosing their name.
Duty Crew
Section titled “Duty Crew”The duty crew form allows the conductor to:
- Select which duty crew they are logging for
- Choose other members present
- Tick the tasks that were completed
- Add optional notes
Task completions are recorded against the duty crew and the selected conductor.
Other Activity
Section titled “Other Activity”Covers meetings, admin work, community engagement, and anything that does not fit a scheduled session. Members select an activity type, enter a brief title, and optionally adjust the duration.
Selecting Your Name
Section titled “Selecting Your Name”All member selection is done via a tap-friendly overlay — no keyboard required. Members tap the Select your name button, then either scroll the list or type a few letters to filter. Tapping a name closes the overlay and pre-fills the form.
Visitor Check-In (Optional)
Section titled “Visitor Check-In (Optional)”When enabled, a Visitor tile appears on the kiosk home screen. Visitors (people without a StationOne member account) can enter their name and reason for the visit. Their check-in is logged to the audit log alongside member check-ins.
Enabling Visitor Check-In
Section titled “Enabling Visitor Check-In”- Navigate to Brigade Settings → Check-In Kiosk
- Ensure the kiosk is enabled
- Click the Visitor Check-In toggle to enable it
To disable visitor check-in, click the toggle again. The Visitor tile disappears from the kiosk immediately.
QR Badge Check-In
Section titled “QR Badge Check-In”Every member has a personal, unique QR check-in code (see Member Check-In QR Codes for where members find theirs). When QR badge check-in is enabled on a kiosk, a Scan Your Check-In Code panel appears at the top of the kiosk screen, above the activity tiles, so members can check in or out without touching the name-selection flow at all.
How Scanning Works
Section titled “How Scanning Works”The scan panel supports two input methods at once:
- Camera — click Scan with Camera to activate the device’s camera and decode a QR code held up to it. Requires a secure (https://) connection; if unavailable, the button is disabled and a note explains why.
- Connected scanner — a USB or Bluetooth barcode/QR scanner in “keyboard wedge” mode can scan directly into the page without any button press. The kiosk keeps an invisible input focused and ready for this at all times.
What Happens on a Scan
Section titled “What Happens on a Scan”- First scan of the day (member not currently checked in): a popup asks “Why are you on station today?” with today’s active events and training sessions listed, plus an Other Activity option. Tapping one records the check-in against that reason.
- Second scan (member already has an open check-in today): the member is checked out immediately — no popup, no reason needed.
A toast confirms the result (“Welcome, [Name]! Checked in.” or “[Name] checked out.”), then the page reloads after a short delay so the Currently Checked In list reflects the change.
If the unit has an On Station availability status configured, a QR check-in also sets the member’s availability to On Station for the day, and restores their previous status automatically when they check out (or when swept up by Check Out All or an overdue auto-checkout).
Enabling or Disabling QR Check-In
Section titled “Enabling or Disabling QR Check-In”QR badge check-in is controlled per kiosk configuration, not per unit:
- Navigate to Brigade Settings → Check-In Kiosk
- Find the kiosk configuration in the list
- Click QR Check-In On/Off to toggle it for that device
When disabled, the scan panel is hidden entirely and members must use the name-selection tiles instead.
Audit Log
Section titled “Audit Log”Every check-in via the kiosk is recorded and viewable in the settings page.
Viewing the Log
Section titled “Viewing the Log”- Navigate to Brigade Settings → Check-In Kiosk
- Scroll down to the Check-In Audit Log section
- The log shows the most recent check-ins first
Each row shows:
- Date and time of check-in
- Member name (or visitor name for visitor check-ins)
- Check-in type (colour-coded badge)
- Reason (session name, activity type, or visitor purpose)
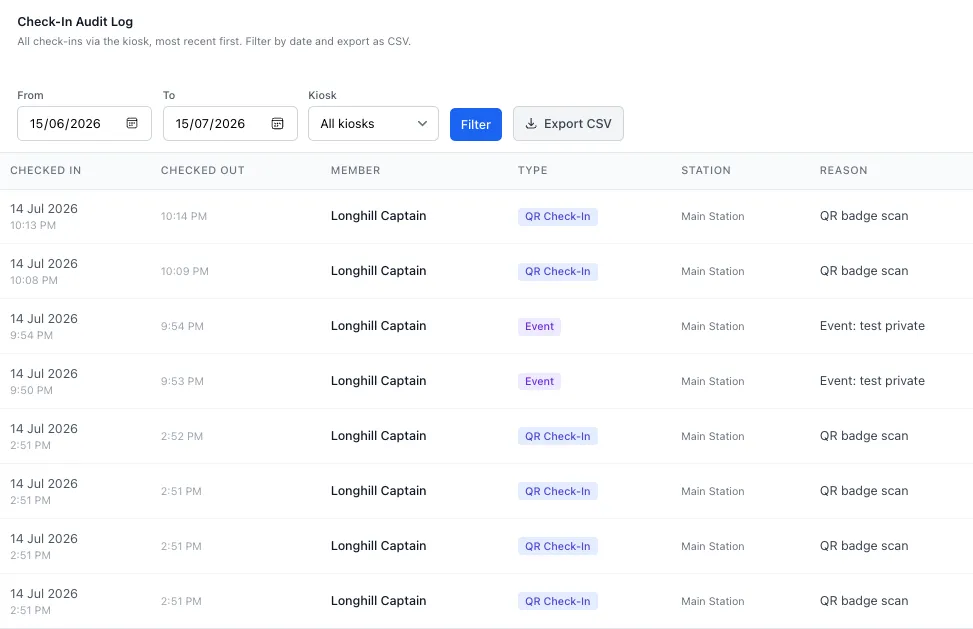
Filtering by Date
Section titled “Filtering by Date”- Set a From date and To date using the date pickers
- Click Filter to update the results
The default view shows the past 30 days.
Exporting as CSV
Section titled “Exporting as CSV”- Set the date range you want
- Click Export CSV
- A file downloads containing all check-ins in the selected range
The CSV includes columns for: Checked In At, Name, Type, and Reason.
Regenerating the Kiosk URL
Section titled “Regenerating the Kiosk URL”If you need to invalidate the current kiosk URL for a device (for example, if it has been shared unintentionally):
- Navigate to Brigade Settings → Check-In Kiosk
- Find the kiosk configuration in the list
- Click Regenerate URL
- Confirm when prompted
- A new URL and QR code are generated immediately for that configuration
- The old URL stops working
Update any bookmarks, printed QR codes, or home-screen shortcuts with the new URL.
Disabling the Kiosk
Section titled “Disabling the Kiosk”- Navigate to Brigade Settings → Check-In Kiosk
- Click the Enable toggle to turn it off
- The kiosk URL stops working immediately
You can re-enable at any time. The same URL token is reused unless you have regenerated it.
Tips for Station Deployment
Section titled “Tips for Station Deployment”- iPad: Add the kiosk URL to the home screen via Safari → Share → Add to Home Screen. Enable Guided Access (Settings → Accessibility → Guided Access) to lock the device to the kiosk page.
- PC or laptop: Open the URL in a browser and use full-screen mode (F11 on most browsers). Consider using a kiosk browser extension to prevent members navigating away.
- Printed QR code: Download the QR code from the settings page and print it A4. Members can scan it with their personal phone if they prefer not to use the shared device.