Create and Manage Events
This guide covers creating, editing, cancelling, and deleting brigade events in StationOne.
Prerequisites
Section titled “Prerequisites”- Brigade admin or organisation admin role
- Event details (date, time, location, type)
Create an event
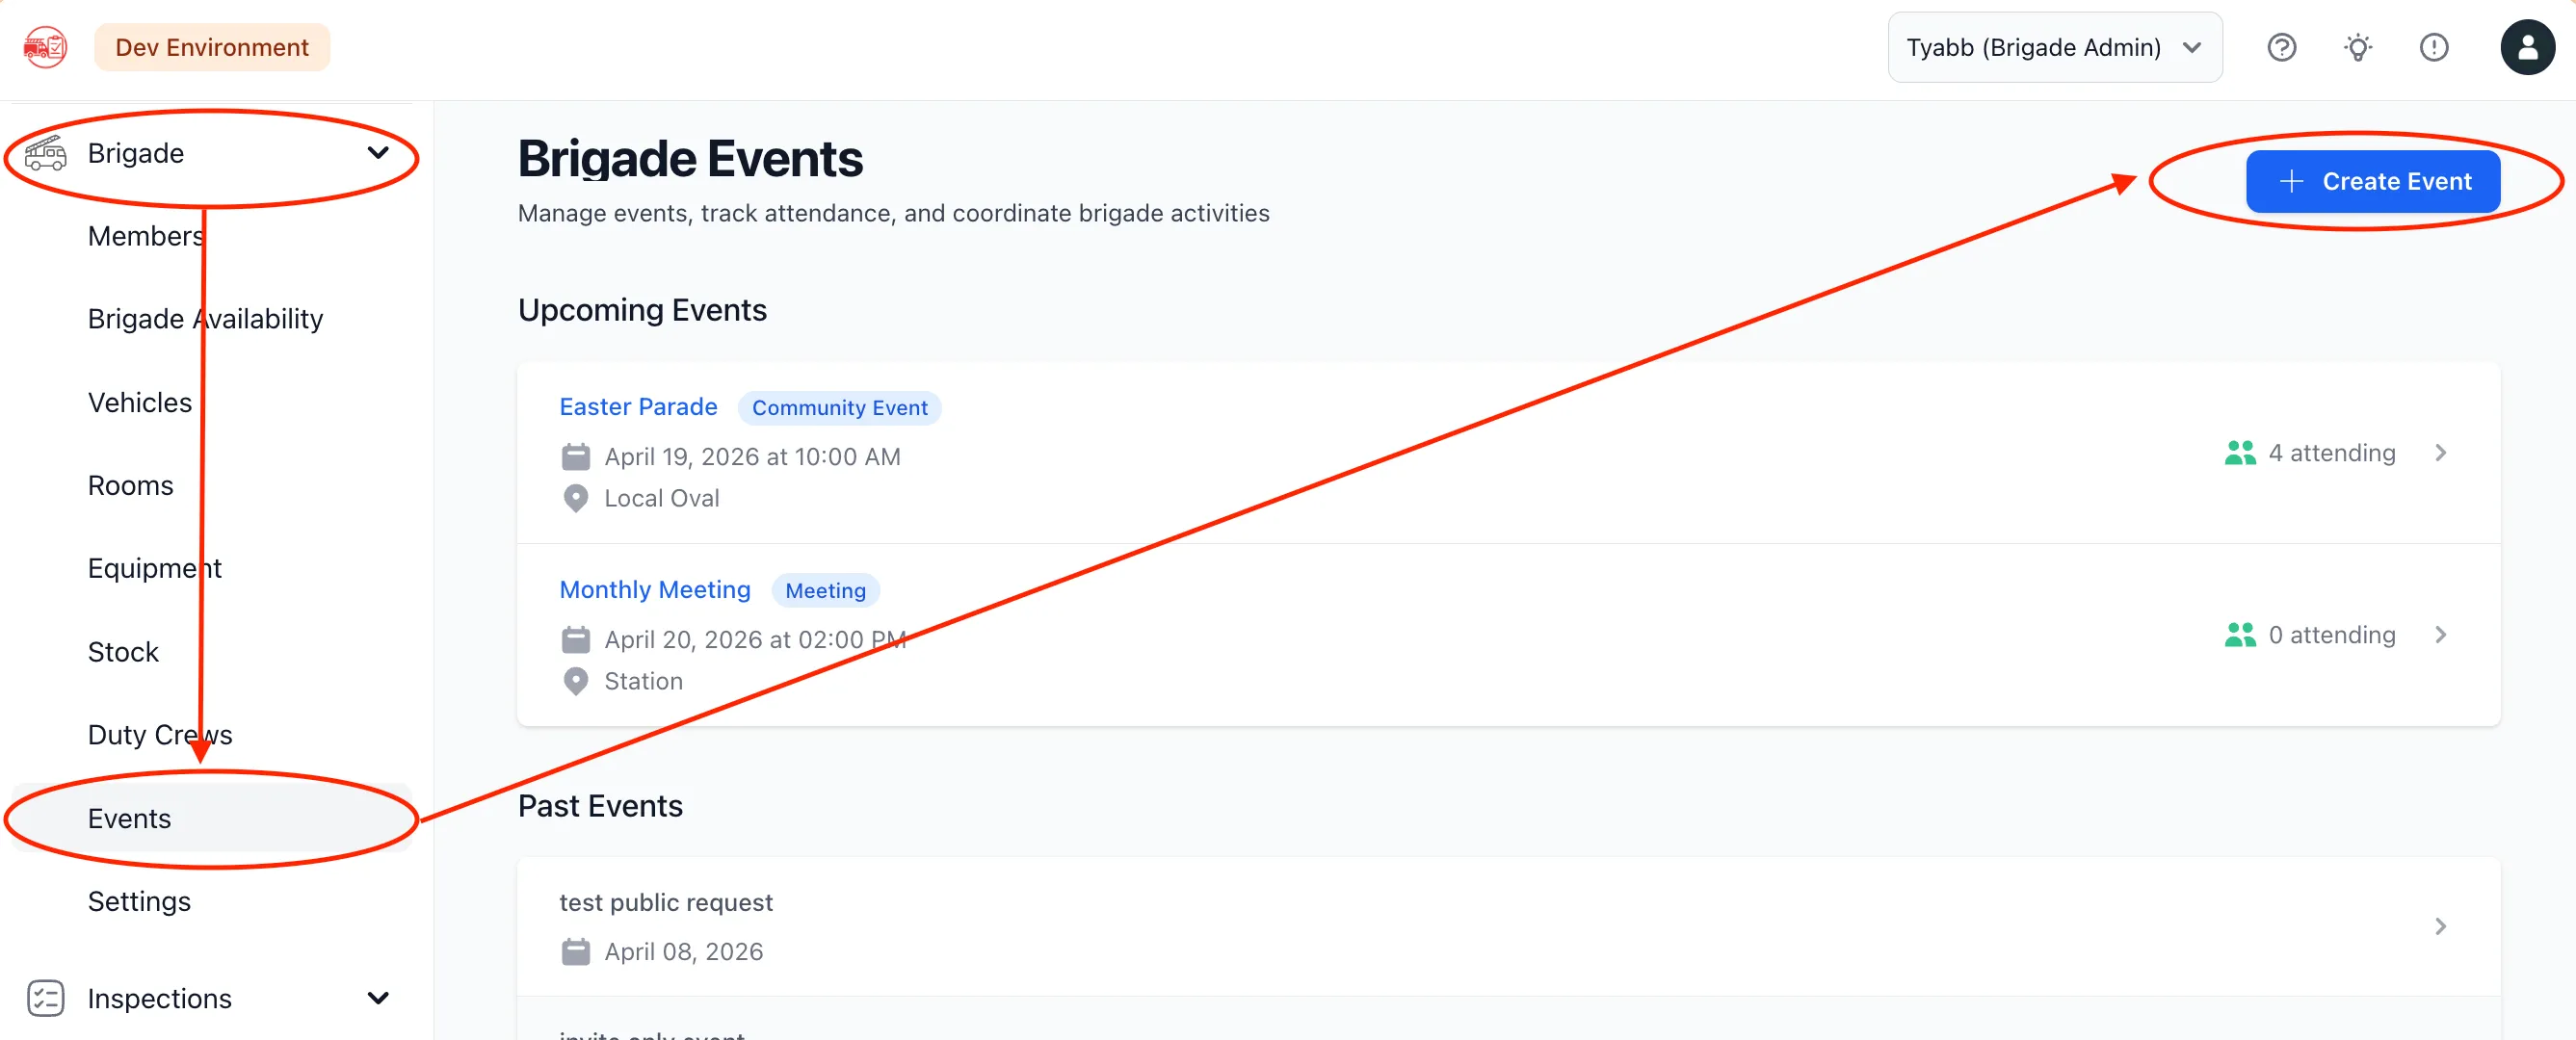
Section titled “Create an event”- Click Events in the main navigation
- Click New Event
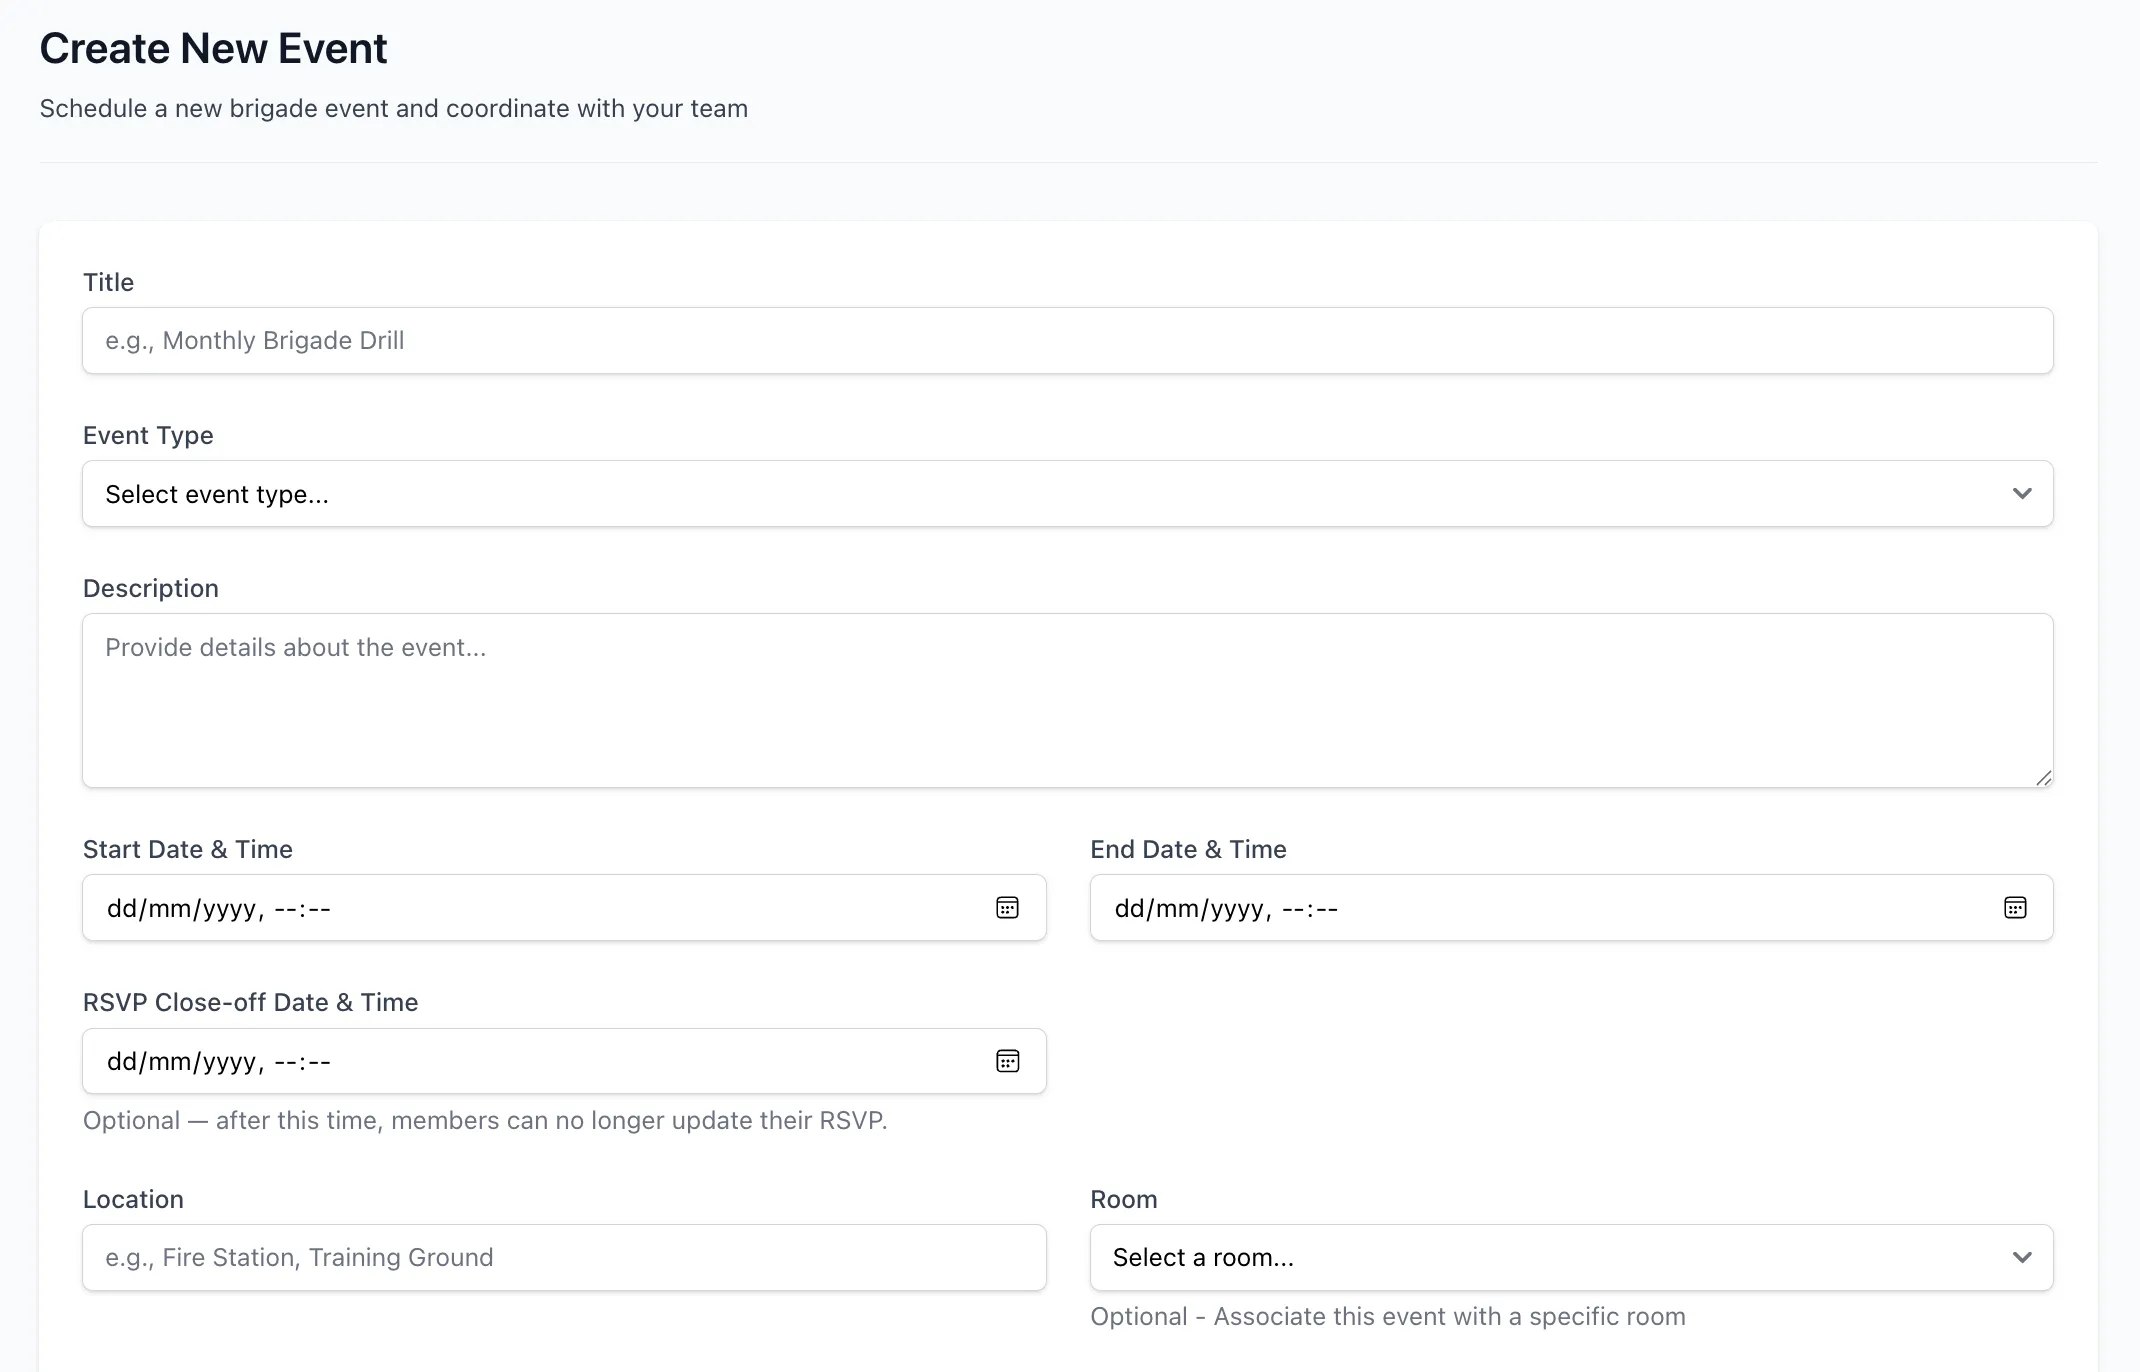
Basic information
Section titled “Basic information”Title (required)
- Clear, descriptive event name
- Example: “Fire Prevention Week”, “Annual BBQ”, “Vehicle Maintenance Day”
Event Type (optional)
- Predefined types: Meeting, Community Service, School Visit, Preschool Visit, Community Event, Brigade Event
- Select Other (specify below) to enter a custom type
- The type appears on the event card, details page, and invitation emails
- Meeting events use a different RSVP flow — see Meeting RSVPs
Description (optional)
- Agenda, requirements, what to bring, special instructions
Location (optional)
- Venue or meeting point — Example: “Station 1 Training Room”, “Community Park Pavilion”
Schedule
Section titled “Schedule”Start Date & Time (required) — When the event begins
End Date & Time (required) — When the event ends; must be after the start
Vehicle assignment
Section titled “Vehicle assignment”Select one or more vehicles to reserve for the event. Bookings are created automatically for all selected vehicles. Only bookable vehicles from your unit appear in the list.
Notification
Section titled “Notification”Send Notification
- Tick to send invitations to all unit members immediately when the event is saved
- Leave unticked to create the event without sending anything — you can send invitations later
Click Create Event to save.
Edit an event
Section titled “Edit an event”- Open the event from the events list
- Click Edit
- Update any fields: title, description, location, event type, dates, or vehicle assignments
- Click Update Event
Vehicle changes are synced automatically:
- Adding a vehicle creates a booking immediately
- Removing a vehicle cancels its booking
- Changing the event time updates all vehicle bookings
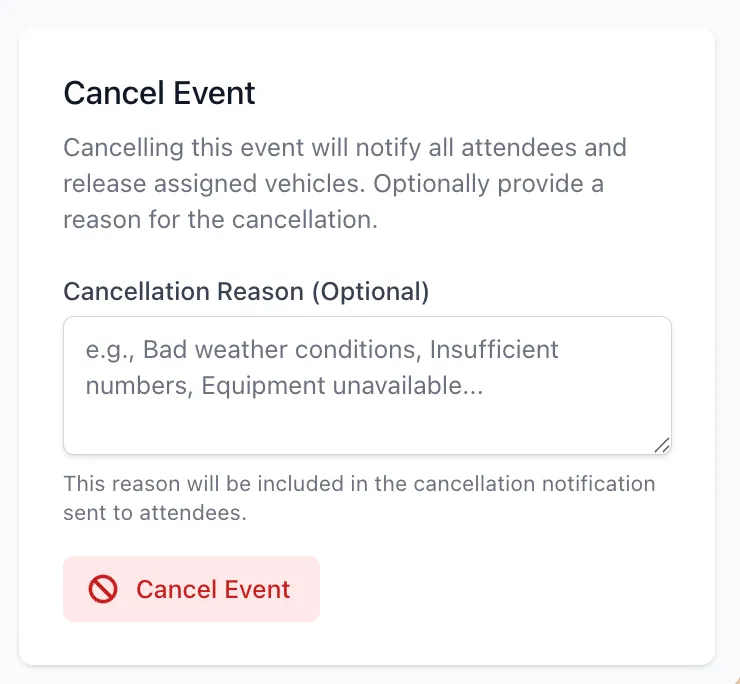
Cancel an event
Section titled “Cancel an event”- Open the event
- Click Cancel Event
- Enter a cancellation reason (optional but recommended)
- Confirm
When cancelled:
- The event is marked cancelled and moves to the Cancelled Events list
- Vehicle bookings are released
- Cancellation emails are sent to members with Attending or Maybe status
- Members with Not Attending or Apology status are not notified
Delete a cancelled event
Section titled “Delete a cancelled event”Cancelled events can be permanently deleted if they were created in error or are no longer needed.
- Open the cancelled event
- Scroll to the Delete Event section
- Click Delete Event and confirm
Deletion is permanent and cannot be undone. No further notifications are sent — attendees were already notified at cancellation.
When to send invitations immediately
Section titled “When to send invitations immediately”Send now if the event details are finalised and the date is far enough out for members to plan.
Send later if details might change, you’re waiting for approvals, or you want to coordinate the timing of your communications.
Vehicle assignment
Section titled “Vehicle assignment”Assign vehicles early to prevent double-booking and show the appliance as unavailable to other bookings. If you’re unsure how many you’ll need, wait for RSVPs then add vehicles once you have a headcount.
Cancellations
Section titled “Cancellations”Provide a cancellation reason — it reduces follow-up questions. Cancel as early as possible to give members notice and release the vehicles. If the event is being rescheduled, create a new event rather than editing the cancelled one — it gives members a fresh RSVP and keeps the history clean.
Common issues
Section titled “Common issues”Vehicle not appearing in the list
Section titled “Vehicle not appearing in the list”- Verify the vehicle is marked as Bookable in its settings
- Confirm the vehicle belongs to the same unit as the event
- Ensure the vehicle is active (not retired)
Members not receiving invitations
Section titled “Members not receiving invitations”- Verify the member has an email address in their profile
- Check spam/junk folders
- Confirm invitations were sent (check the “Invited at” timestamp on the event)
- Manually add the member to the event if needed
Related guides
Section titled “Related guides”- RSVPs and Attendance — Managing responses, post-event attendance, and reminders
- Events — Feature overview